
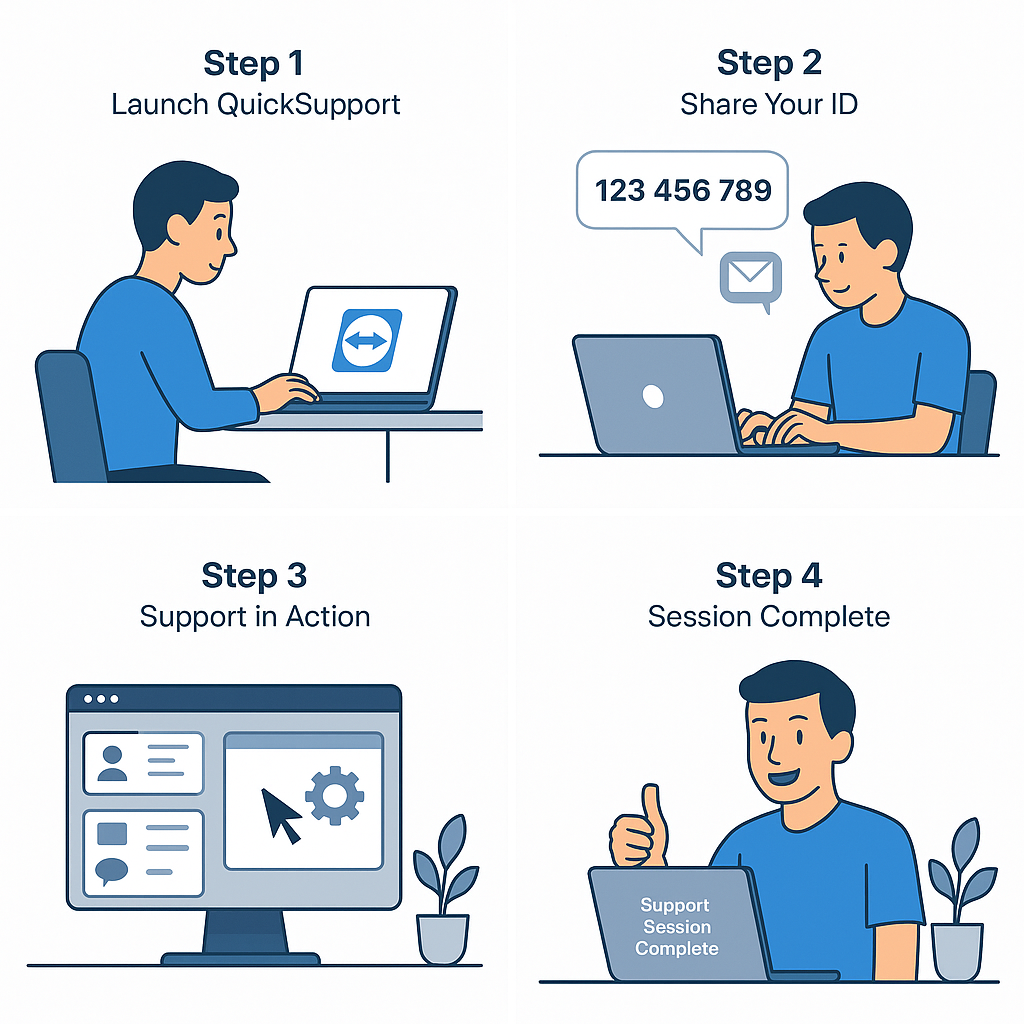
In this article, you will learn how to join a TeamViewer remote session to allow a Mist supports technician to access your computer remotely. TeamViewer is a secure and easy-to-use remote support tool that works with every Windows computer and every Mac. It lets you remote into devices located anywhere in the world and operate them as though you were there.
To join a TeamViewer remote session, follow the appropriate steps below.
Join a remote session on Windows
1. Click the link sent to you via email or chat by a Mist support representative or click the Get remote support Button on website
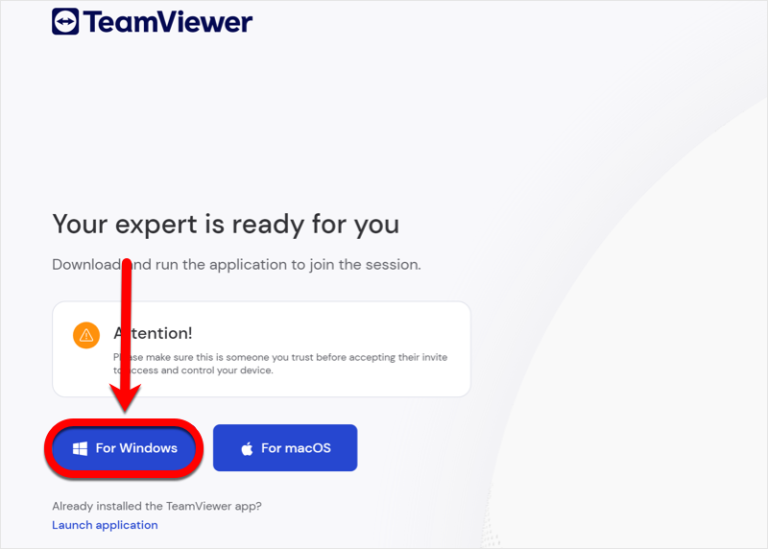
2. Once you follow the link, a page will appear in your web browser. It will ask you to join the session.
- If TeamViewer is not installed on your computer, click the button that says For Windows.
- If TeamViewer is already installed, click the “Launch application” option and then proceed to step 5.
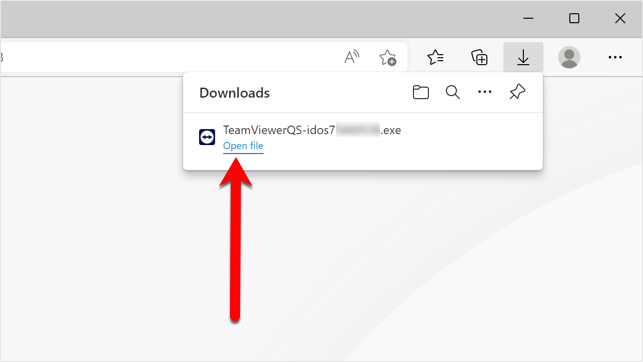
3. TeamViewer will then be downloaded to your computer. Once the download has finished, open the TeamViewer file.
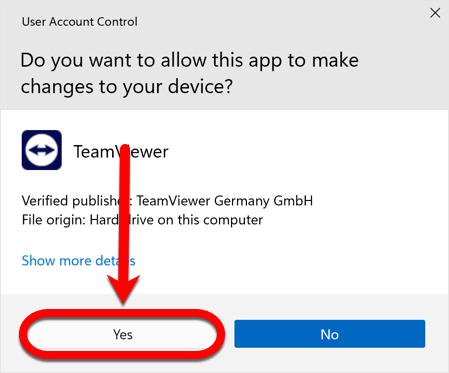
4. A dialog box appears, asking for permission. Go ahead and give the TeamViewer app permission by clicking Yes.
5. Now wait for the Mist supports technician to connect, and click Join to enter the remote session. They’ll take it from there and start the steps to figure out the issue.
ⓘ Note: While connected to your device from a distance, the technician may need you to enter your passwords and help with small tasks that can’t be done remotely.
If you accidentally exit TeamViewer, you can either repeat the above steps or go to your Downloads folder and double-click the TeamViewerQS-idos[…] file to bring back the remote access window to your screen – whichever is easier for you.
Join a remote session on Mac
1. Click the link sent to you via email or chat by a Mist support representative or click the Get remote support Button on website
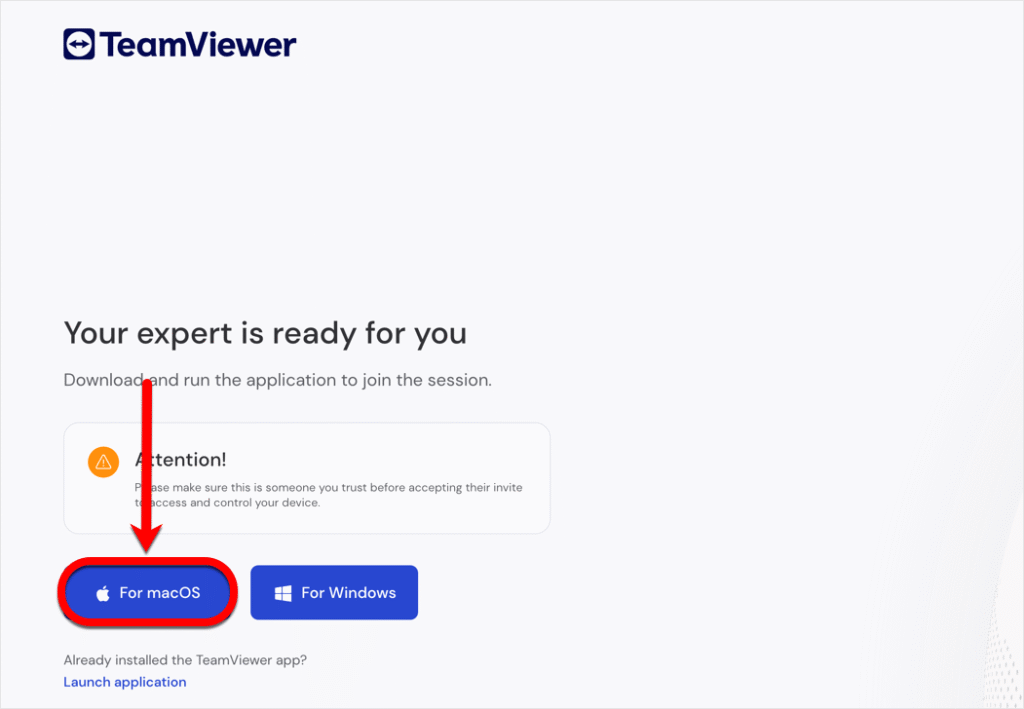
2. Once you follow the link, a page will appear in your web browser. It will prompt you to join the session.
- If TeamViewer is not installed on your computer, click the button that says For macOS.
- If TeamViewer is already installed, click the “Launch application” option and then proceed to step 13.
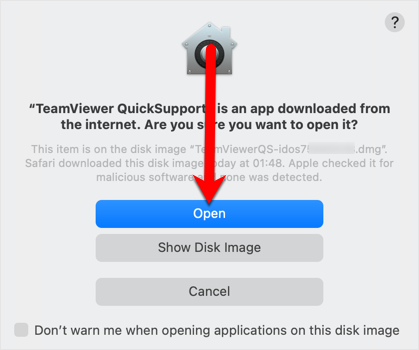
3. TeamViewer will then be downloaded to your computer. Once the download has finished, open the TeamViewer file.
4. Double-click the icon that has a white circle with a double-pointed arrow to start TeamViewer.
5. Click Open if prompted.
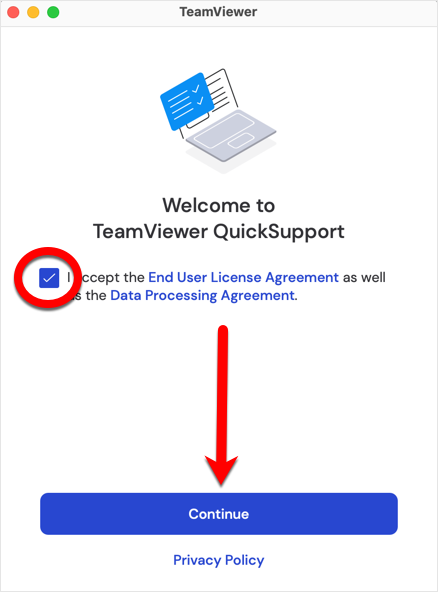
6. Check the small box after you read and agree to the terms of the software license agreement. Once it’s selected, click Continue.
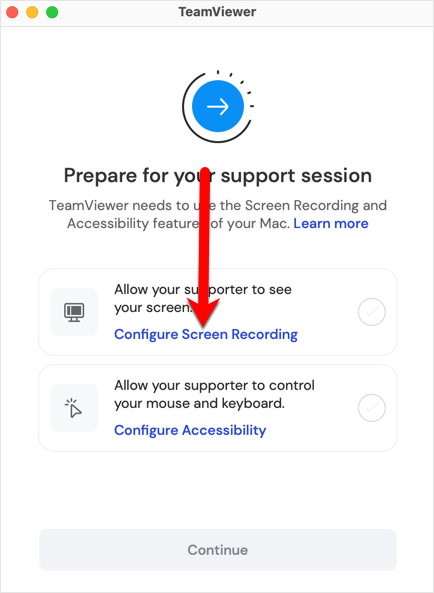
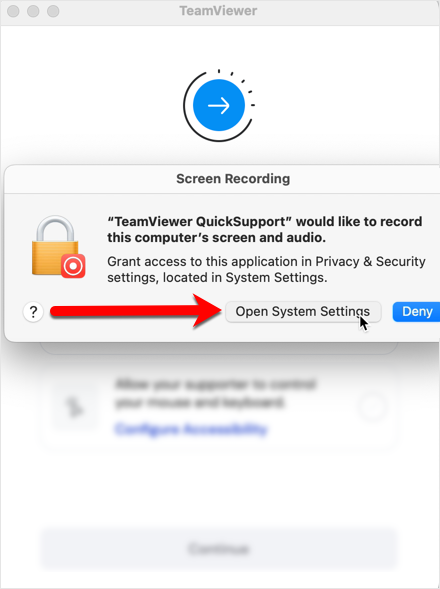
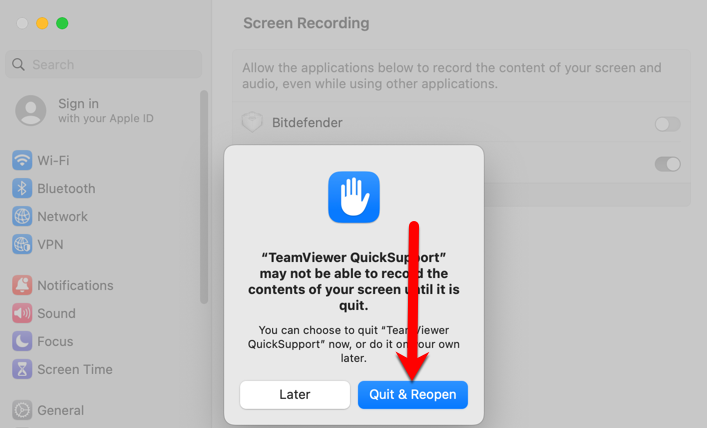
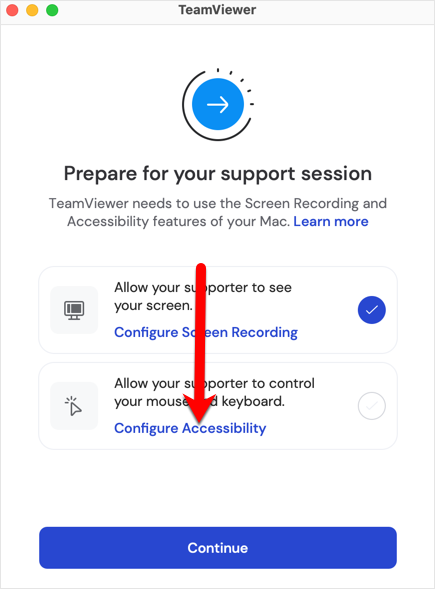
7. If you are running macOS Mojave (10.14) or later, TeamViewer requires your permission to use screen recording, mouse, and keyboard. Click on Configure Screen Recording → Open System Settings (“Open System Preferences” on older Macs).
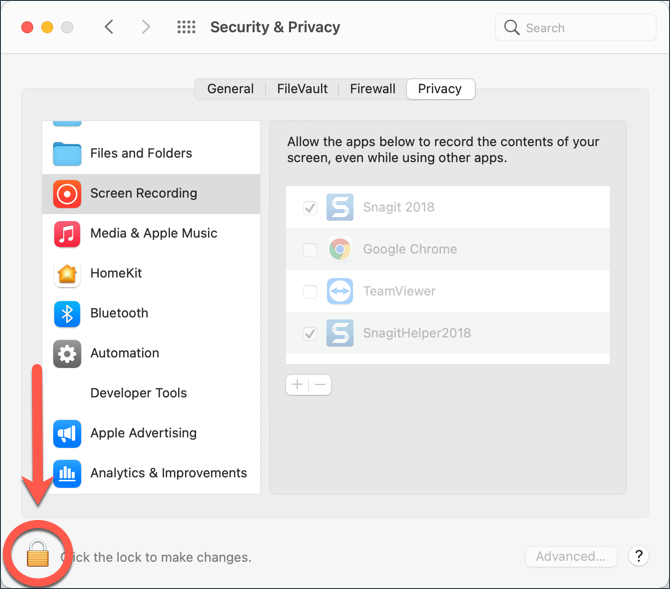
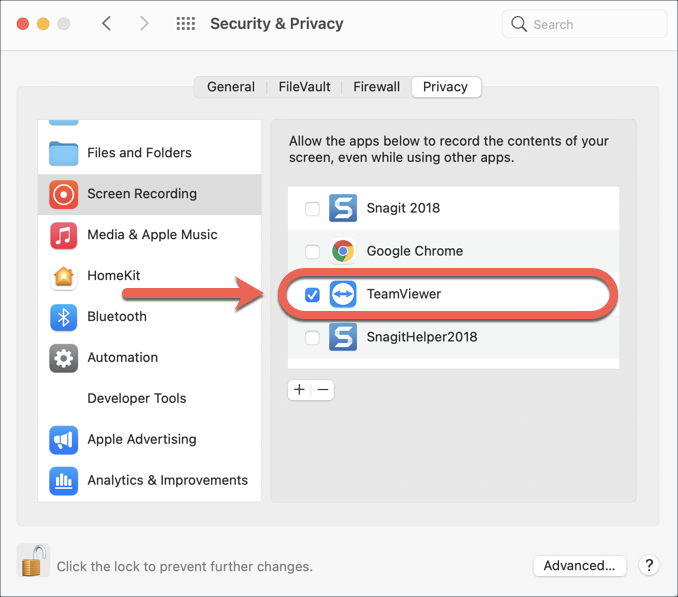
8. Next, enable TeamViewer QuickSupport. When prompted, input your administrator name and password to modify settings.
ⓘ Note: On macOS Mojave (10.14), Catalina (10.15), Big Sur (11) and Monterey (12) you must first click the padlock in the bottom left corner, enter your administrator name and password, and then put a checkmark next to TeamViewer.
9. Press the Quit & Reopen button. TeamViewer will exit and then will reopen itself on your screen.
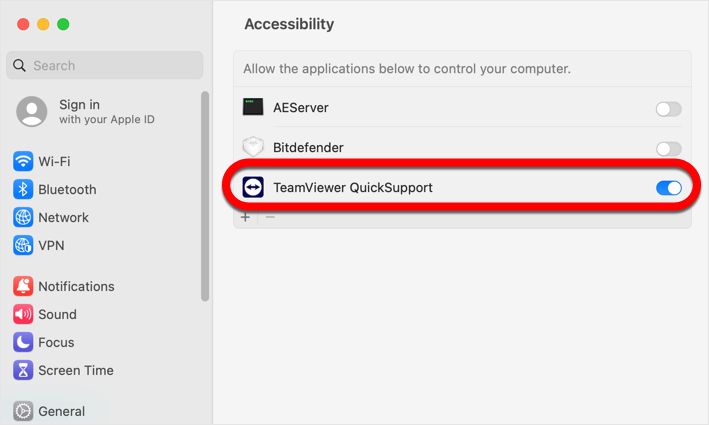
10. Now click on Configure Accessibility inside the TeamViewer window.
11. Enable TeamViewer QuickSupport, then input your administrator name and password, to modify settings.
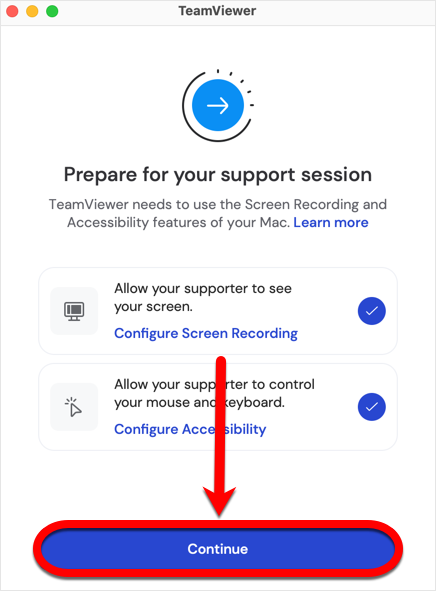
12. Click on Continue in the TeamViewer window.
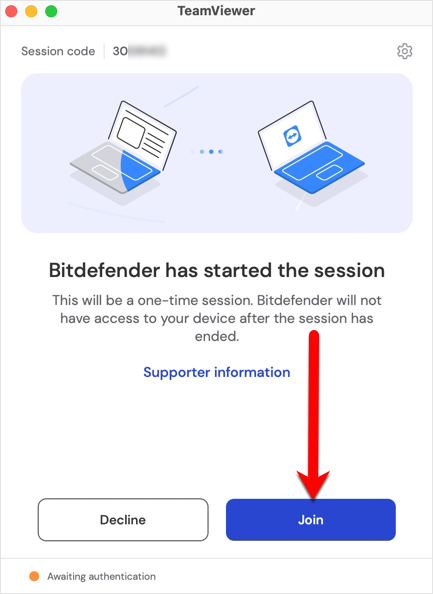
13. Now wait for the Bitdefender technician to connect, and click Join to enter the remote session. They’ll take it from there and start the steps to figure out the issue.

ⓘ Note: While connected to your device from a distance, the technician may need you to enter your passwords and help with small tasks that can’t be done remotely.
If you accidentally exit the remote session, double-click the TeamViewerQS-idos[…] file saved to your Downloads folder to bring it back.
You’re done! From now on, you can enjoy seamless remote assistance as if a Mist support representative is sitting in front of your computer.